
Getting started with Z21
Contents
In this introductory article we will cover the absolute basics getting the Z21 out of the box and a loco running. Later on, we will explore the other capabilities the Z21 offers bear in mind that this is a system that is still being developed, so more functions will be added as time goes on.
For this guide, the screenshots are from the Apple ipad version other tablet screens will have minor differences but the basic operation is the same across all devices. Smartphones running the Z21 app will of course have a smaller screen, typically showing half the information that a pad can display.
You will need:
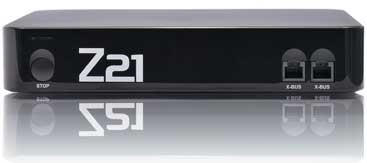
- The Z21 system
- A DCC fitted loco we will use a Bachmann class 40 as a test loco.
- Your pad or phone.
Firstly, we need to download the app from your devices’ app store simply type "Z21" into the search box to find it the app is free so if the Z21 is a system you are thinking of buying, you can experiment with the app first.
The Z21 icon will appear on your home screen.
Connections
Taking the Z21 out of the box, you may need to screw on the UK plug adaptors supplied, unless the retailer has done this for you there are two transformers, the large one powers the Z21 and the smaller one powers the router that comes as part of the Z21.
Plug the network cable supplied into the LAN socket on the back of the Z21
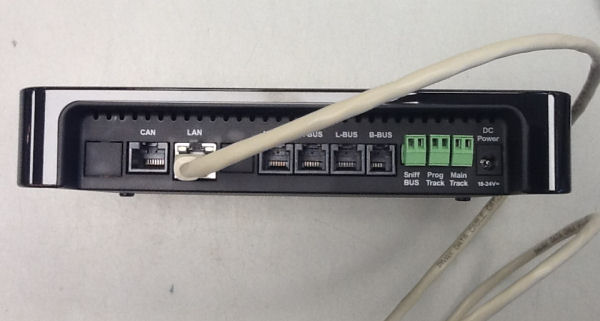
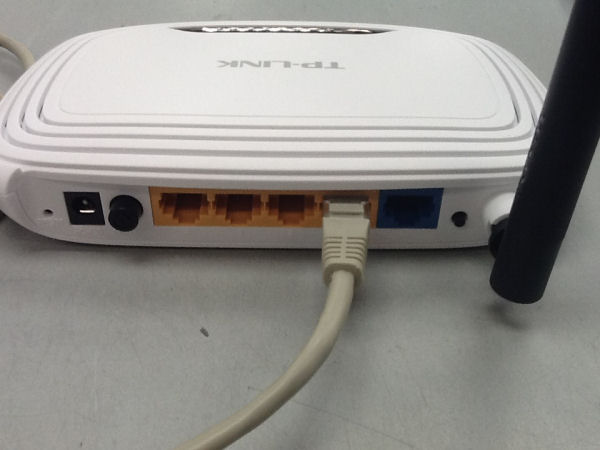
Plug the other end into one of the yellow LAN sockets on the back of the router.
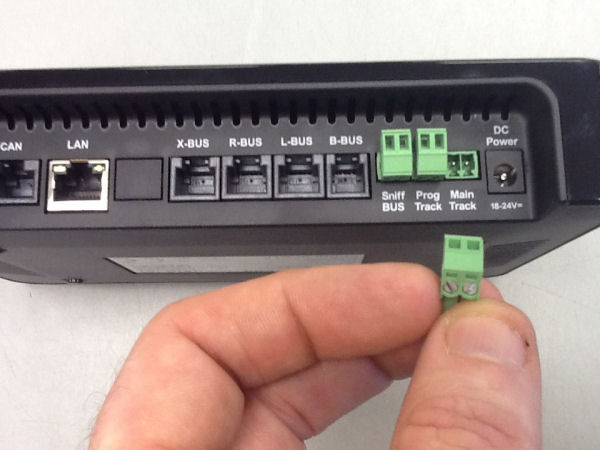
Pull the small green plug from the "main track" outlet on the back of the Z21, and you will see two small screw terminals push the bare wire ends you will be using to connect to the track in the holes and tighten the screws, then push the green connector back in. With these connections made, plug both transformers into a wall socket to power on, and the leads from the transformers into the sockets on the Z21 and router.
Wireless Connection
The Z21 needs to talk to the supplied router to send and receive commands to and from the base unit, so we need to add the router to our devices’ wireless settings. A couple of minutes after turning both units on, the router should be ready. The routers supplied with the Z21 all have "Z21_" as the first part of the device name for easy identification.
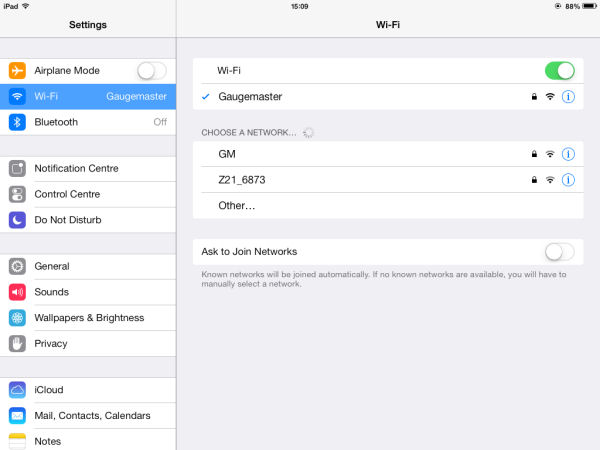
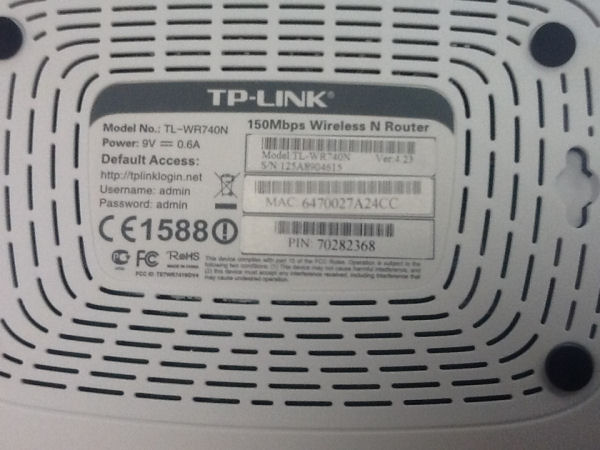
Tap on the Z21 network connection, and you will be asked for the password this is an 8 digit number, and is marked on the bottom of the router as the PIN number.
Our pin number is 70282368. Once this is done, we are ready to go.
Setting Up Our Loco
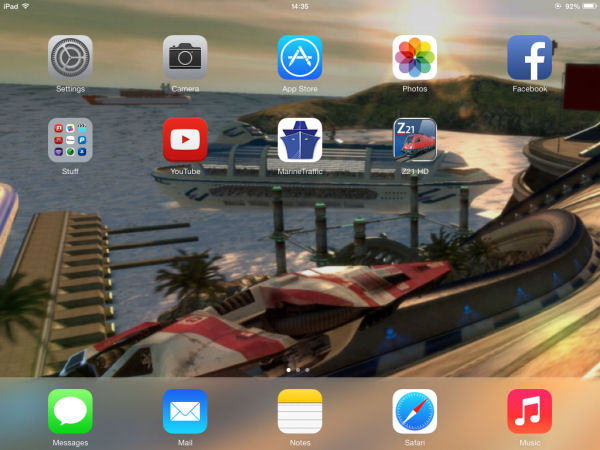
Return to your device home screen, and find the Z21 icon - tap on it to reach the main screen
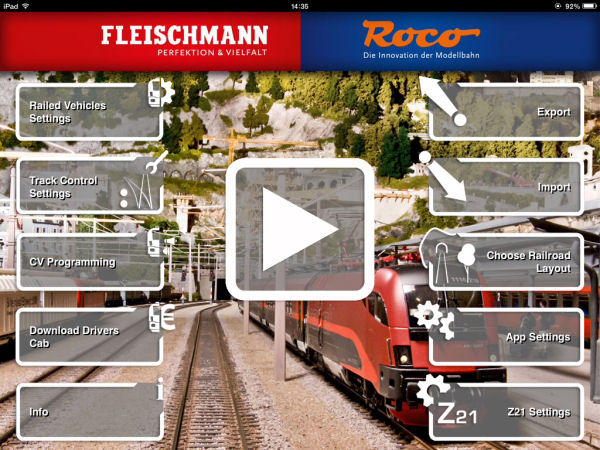
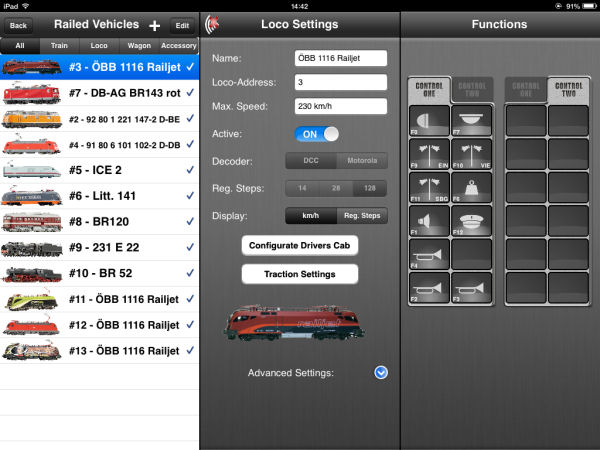
In the centre is the all important "play" button but we will need to add our test loco to the roster before we can run it. Tap "railed vehicle settings" on the top left to see what locos are listed.
You can see that there are several locos listed already, from the Roco range
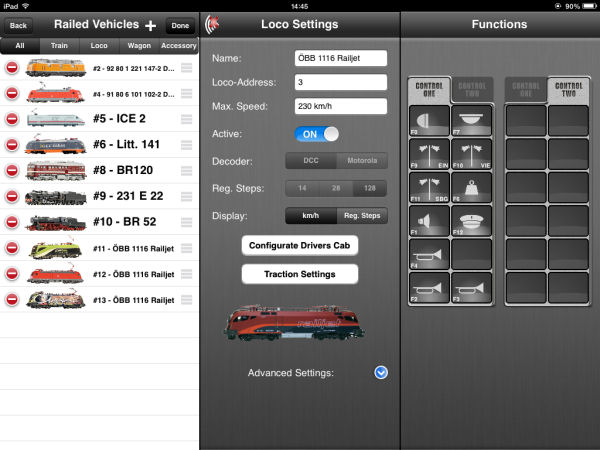
For clarity we will first clear the list. Tap the edit button at the top; a small minus symbol appears next to all the listed locos tap one and "delete" appears to the right of the loco name. Tap this to delete the locos one by one, than tap "done" to finish.
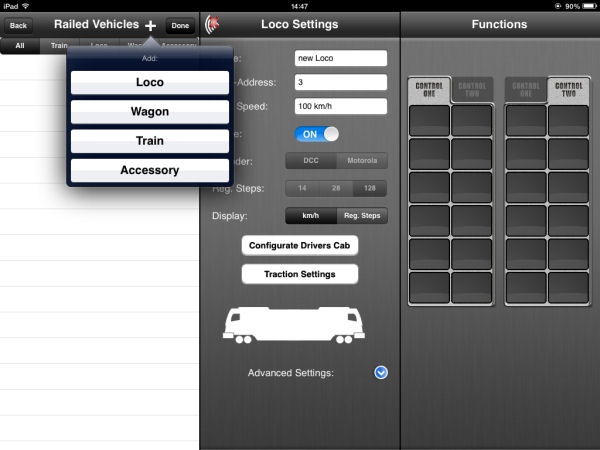
Now we have a clean sheet, we will add our loco. Tap the plus symbol a small menu will pop up letting us choose what type of vehicle we are adding tap loco, and we can now start entering our loco’s details.
In the centre, we can see the options for our loco tap on one of these to change the setting. We are using a Blue class 40 for the test, so enter this into the name field
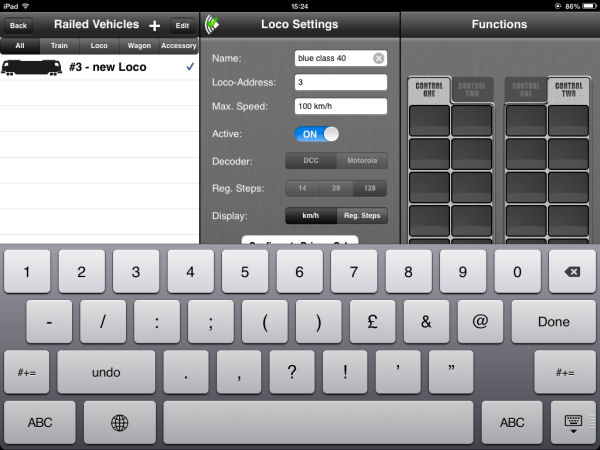
As we are using a brand new loco straight from the box, this is already set to address 3 so we do not need to change this. If you already have digital locos set to different addresses, you can change the address to suit the loco you are using. For now, we will not change the speed steps or decoder type, and we will leave the display set to km/h. We can skip the drivers cab and traction setting too, but we do need to add a picture for easy identification. Tap the loco silhouette, and choose camera to take a photo of the loco. A letterbox appears to show you how the photo will look.
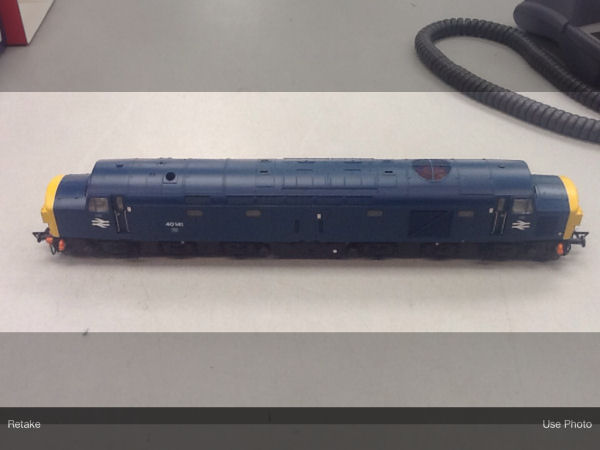
Once you have taken the photo, you can retake it, or tap "use photo" if you are happy with your photo. The photo now appears on our loco listing.
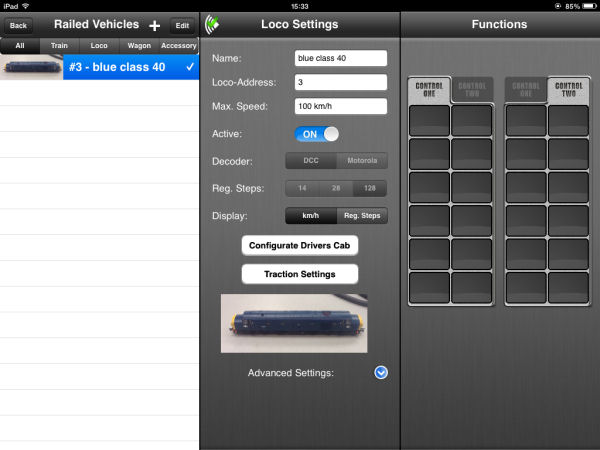
If you wish, you can tap on advanced settings this is actually used as a library for the loco, it does not actually contain settings that affect the running of the loco so you can leave this for later.
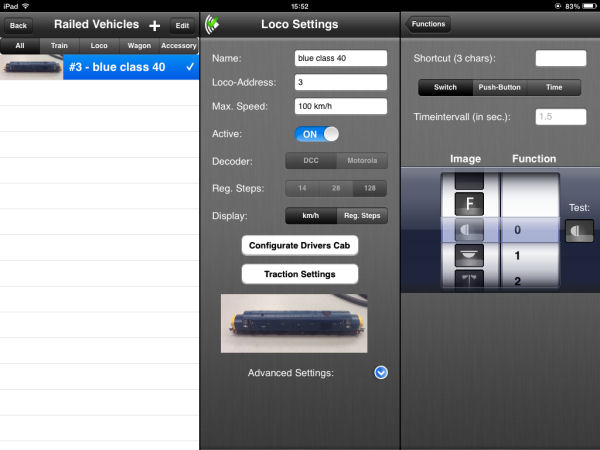
To the right, we can add function controls for now we will just add the loco lights. Tap on one of the slots to choose the function to add. We can leave the shortcut for now, and as we are setting the lights we can leave the function set to "switch" as the lights are an on/off function. The lights are controlled by function zero, so all we have to do is find a suitable symbol swipe up until you find a light symbol.
Finally tap the function button at the top to see what we have set
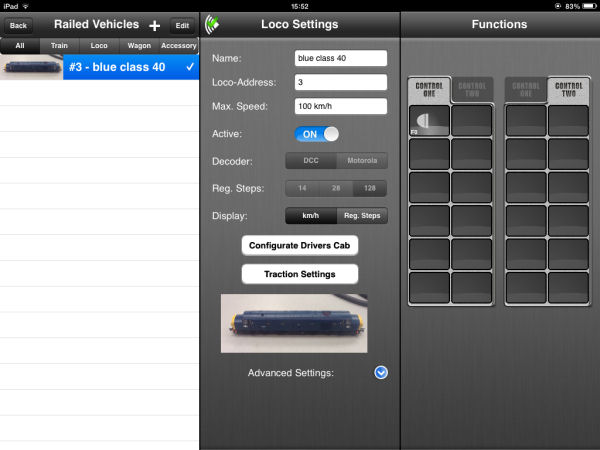
With this done, our basic set up is complete, so pop the loco on the track, and press the back button to return to the main screen. Now press the play button!
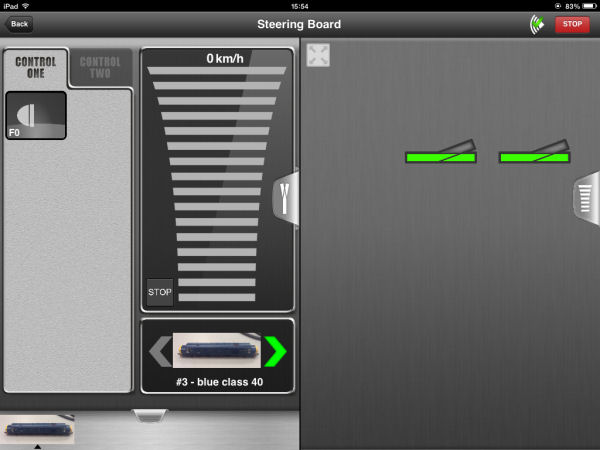
Running Our First Loco
Our loco controls are by default on the left of the screen, and our layout controls to the right you can see a couple of points there already, but for now we will just test our loco. To the left the functions available on our loco are shown, and the throttle is to the right of these. At the bottom is our loco clipboard once you have more than four locos added to the roster you can swipe left or right to reach the locos that are off screen. You can also swipe the clipboard clip upwards to bring a larger view of the roster up simply tap a loco to take control of it.
To start the loco, swipe your finger gently up the throttle the display will match your movements. Swipe back down to slow the loco or bring it to a halt, or tap stop to stop it completely. Tap the lighting button on the left to turn the lights on or off, and tap the direction symbols either side of the loco picture to change direction it’s as simple as that!
In future parts of the guide, we will take a look at programming locos, adding points and a layout diagram, driver’s cab displays, importing and exporting layouts, double heading and more!
