
Z21 Guide: Point and Route Settings
Contents
In this third article, we will look at adding point decoders and getting them added to the track control screen. We would recommend using the newer style "learning" decoders like the Train Tech PC2 or the DCC Concepts AD series. Older style decoders will work, but the Z21 will run new decoders much more easily. To ensure compatibility with older Roco decoders, the Z21 treats many newer accessory decoders as if the address is set four higher than it actually is this can be disabled using the Z21 maintenance tool on a computer, we will cover this and older decoders in part four. The newer learning decoders do not suffer from this at all, as the address of the decoder is set in a different way.
Layout Diagrams or Photos
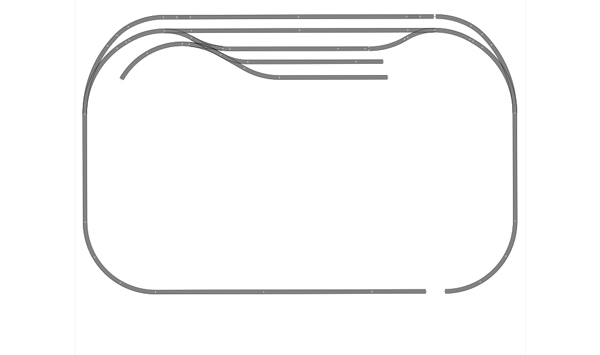
You will need to decide if you are going to overlay the controls for your points on a photo of the layout, or a diagram if this will be clearer. A diagram can be pretty much any image file that your tablet or phone can display. This could be hand drawn, or you can use one of the many track planning programs available on the internet at Gaugemaster we tend use a program called Anyrail. The trial version of this is free, and lets you use fifty track sections. This is more than enough to map out the junction areas of your layout, you would not need to include plain track sections. As an example, below is my garden line, we will add the point controls on top of this.
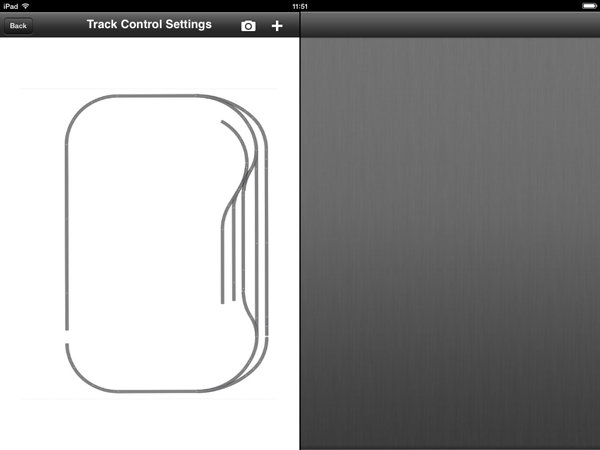
From the main Z21 screen, tap on track control settings now tap the camera icon to add either a photo or the diagram you have created. The Z21 will give you the option of taking a photo of the layout if you have not done so already.
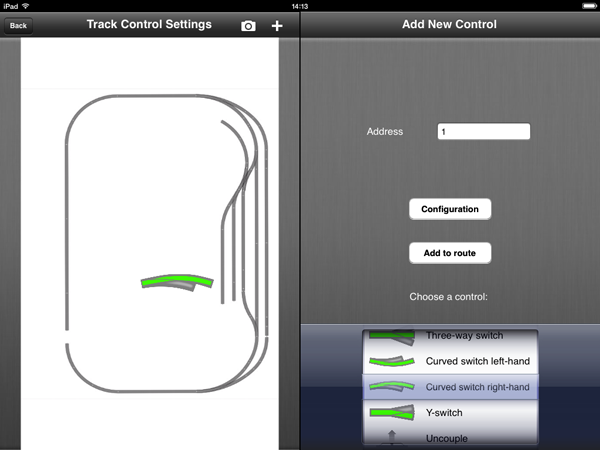
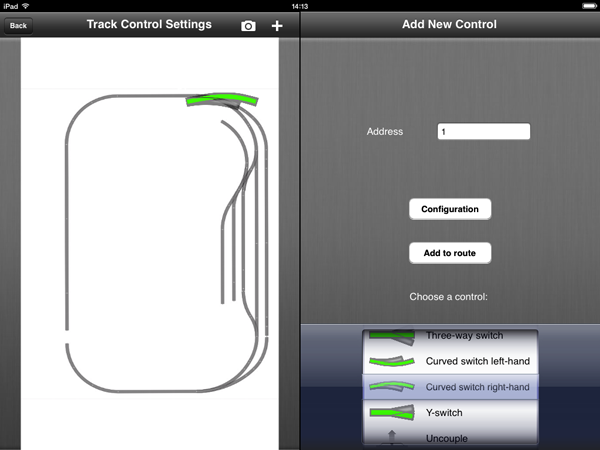
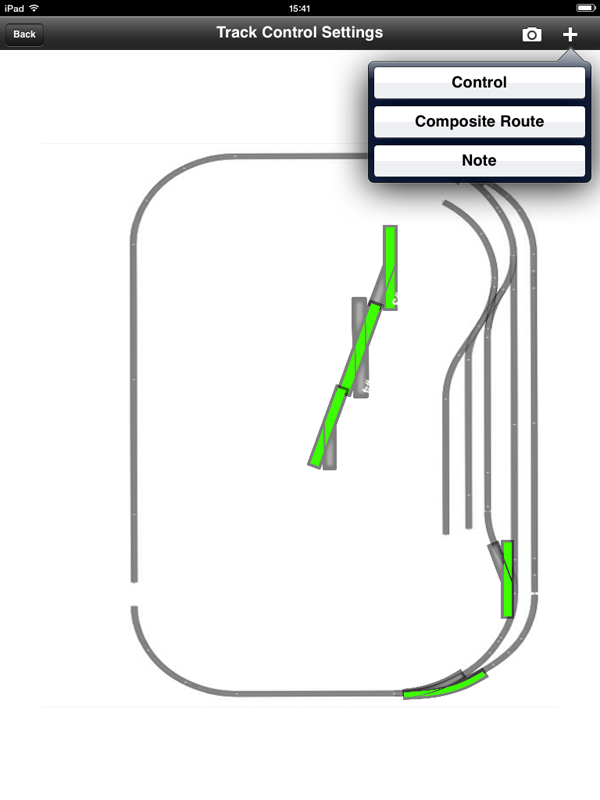
Next, we will start adding the point controls. Tap the plus icon you can now choose between control, composite route, or note. We will worry about routes later (and we need points before we can add routes) so for now, tap control. This brings up the controls menu scroll through the menu to find the type of point you want. Starting at the top of the diagram, we need a right hand curved point, which appears on the diagram:
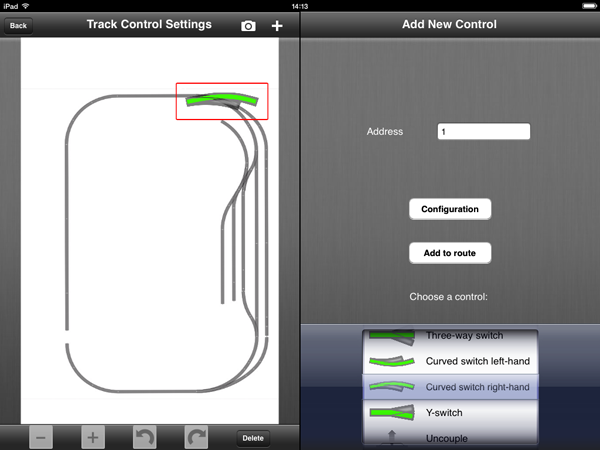
Drag this until it is above the point in question on the diagram:
Once there, hold down your finger on it this opens a menu at the bottom:
We can now change the scale of the point control on screen, and rotate it to match the diagram.
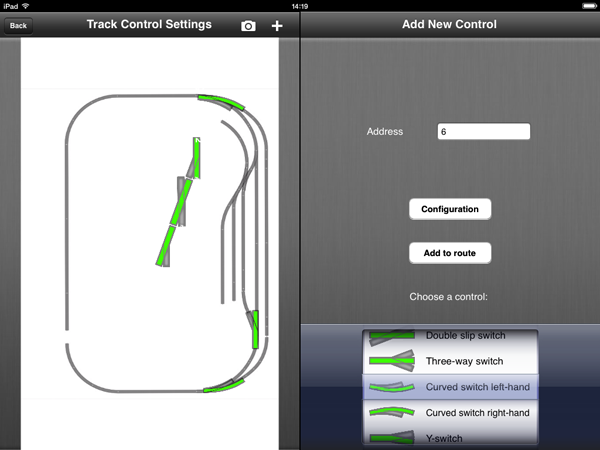
We will leave the address set at 1 at this stage. Tap the plus icon again, and continue to add the points you need. As the yard area is complex and rather cramped, I have laid the point controls next to the track this means I can leave them larger and easier to use with stubby fingers:
As you add points, the Z21 sets the next address in sequence for you this address can be changed whenever you want by tapping on the relevant point in the track settings screen. For us, if we are using "learning" decoders like the DCC Concepts or train Tech models, this actually saves us a job.
We can put aside the tablet for now, and connect up the accessory decoders to the track. My layout runs with the DCC Concepts version:
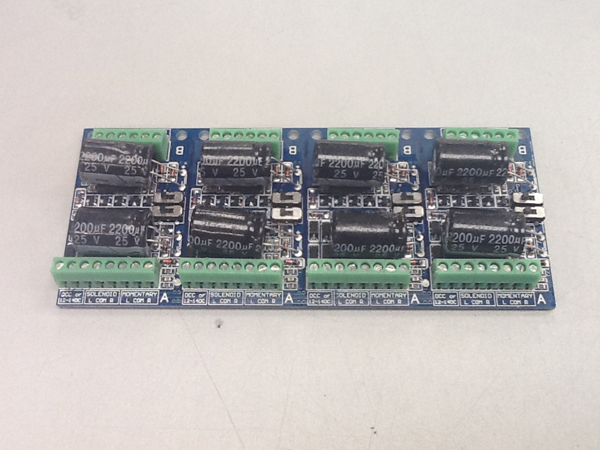
Two wires take power from the track, these connect to any of the DCC/12 to 14 volt terminals one connection will reach the entire decoder. The learn switches can be seen in the centre of the decoder.
The solenoid connections are where we take the wires that will run to the point motors. Once these are connected, we can return to the tablet. If you find it easier, connect one motor up at a time once you have the hang of it you can do the rest, they do not all need to be done at once.
Power up the system, and press the play button on the screen you should see the track diagram we have created (if you are using your phone, tap "controls" to see this):
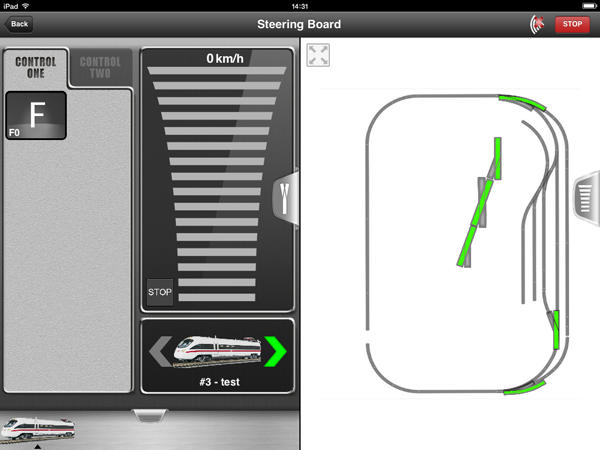
We will set the point addresses from top to bottom on the decoder, slide the "learn" switch that is connected to the first point to the right. The decoder is now listening for the accessory command that will trigger it. Tap the point control on the Z21 screen, and the decoder will set itself to this address. Slide the switch back to the left, and the address is set!
If you find the point diagram is showing the opposite way to the point itself (straight when set to curved for example) no problem we can change this for any point in the track settings screen. Tap back to return to the start screen, and tap on track settings. Tap on the point you want change, and tap on configuration this opens another screen, where you can see what way the point currently changes:
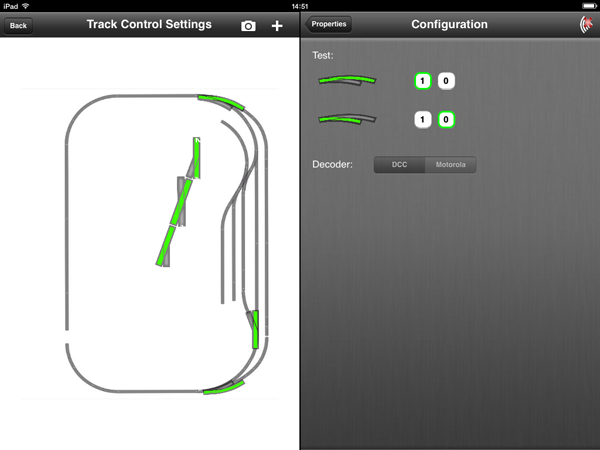
Tap on the 0 and 1 buttons to swap the orientation around:
You can even test the orientation from this screen, just tap test to make sure it is set correctly.
Return to the main screen, and tap the play button. You can now use the learn switches on the decoder to set the point addresses for the rest of the points.
Route Setting
Once you have the points set up, you can also set up routes rather than having to control each point individually, the Z21 can change every point needed to get from one track to another. Even on a small layout, this makes shunting an awful lot faster. On my garden line, I have a main running loop, a shorter station loop, a very short goods loop and two sidings that can also be accessed from a headshunt. When setting up routes, you can either name them or number them for easy recognition it is entirely up to you.
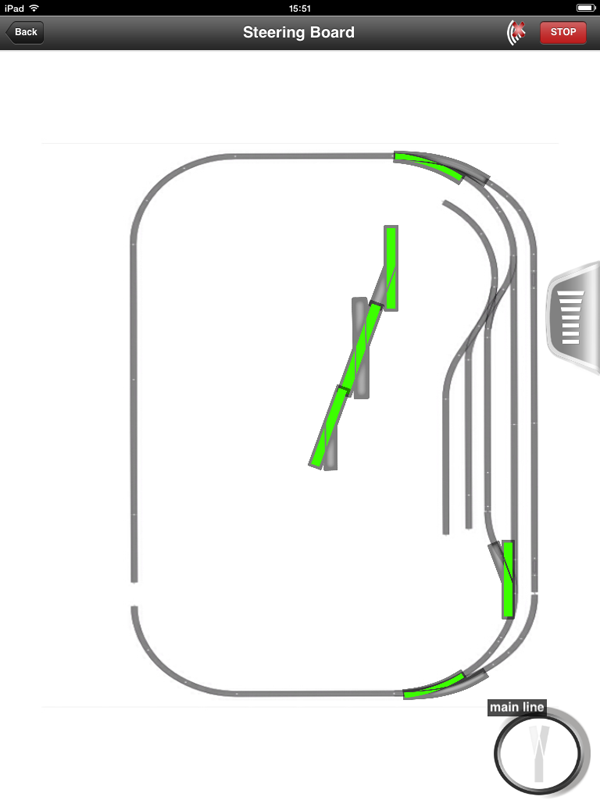
We will set up our first route, the main line. Return to the start screen, and tap track control settings. Tap the plus symbol to bring up the menu, and tap "composite route":
Enter the name of the route you can see the route symbol has appeared in the track diagram:
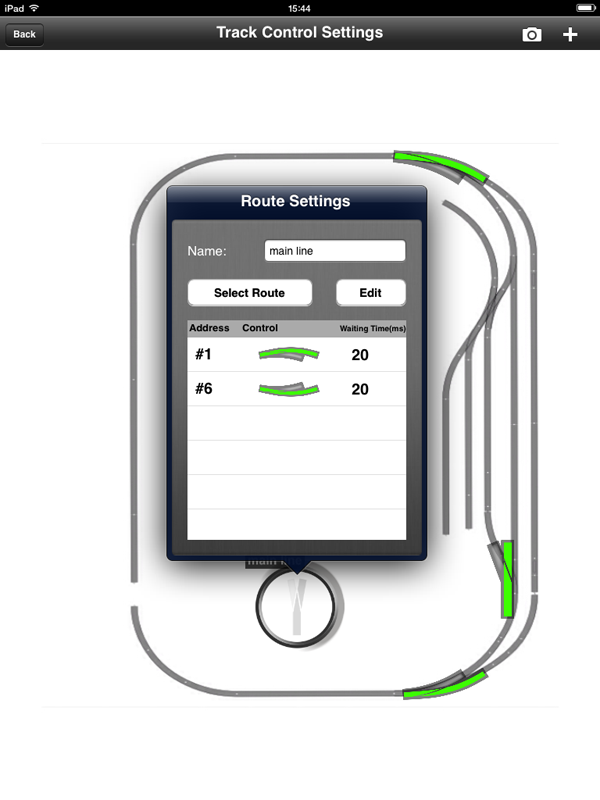
Next, tap select route, then tap each point that is on the route you want to set, then tap finish tap on the route symbol to see the route you have set. If a point looks like it is set the wrong way, tap the symbol to set it the right way. You can drag the symbol to somewhere more useful on the screen, and just like a point control, you can hold down your finger on the symbol to resize it. If you now return to the play screen, you can test the route. Set the points in your route to the wrong way:
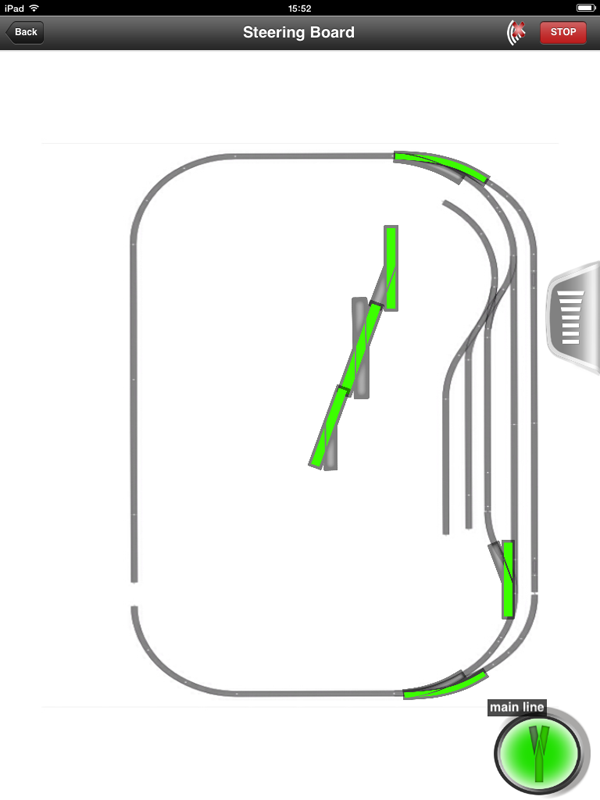
And now tap the route symbol both of the points we have set will now move to the main line, and the route symbol turns green to show you which route is set:
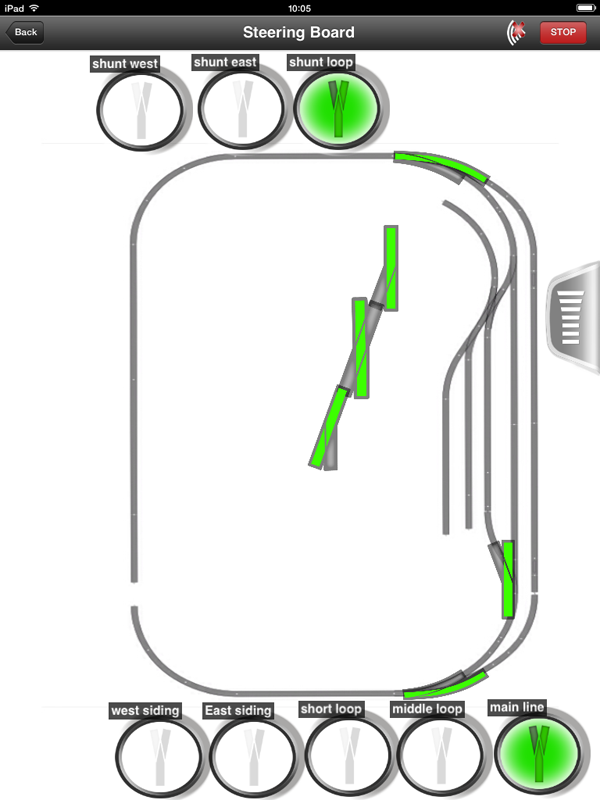
Going back to the track settings screen, we now add a route for each loop and siding. When finished, our track control screen now looks like this:
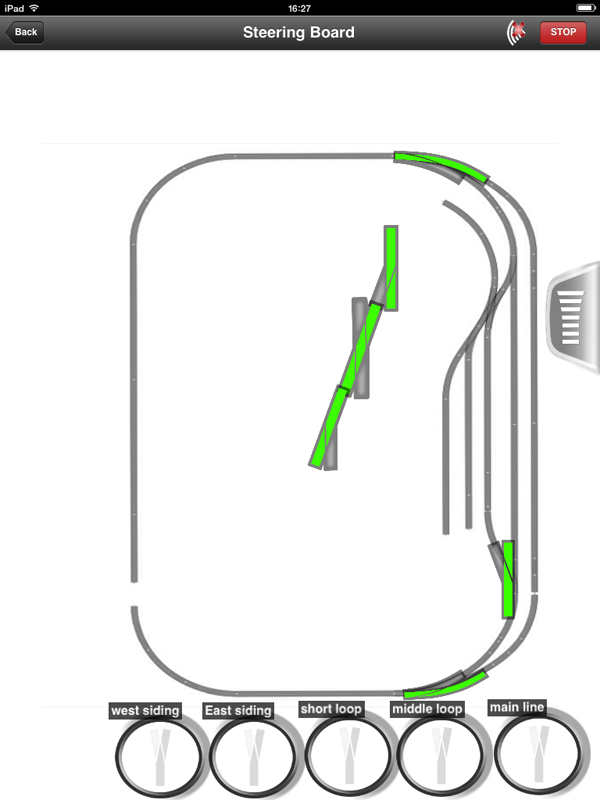
Tapping on any of the route controls now changes every point on that route, and lights the control to show you what is set.
But what of the headshunt? This can be used to assemble trains, by pulling wagons out of the sidings and placing them on the short loop this means we can shunt without interfering with trains running past on the main line. We can add routes using the headshunt as well. As the main line points will not be added to these routes, they will not affect trains running past. We can call them shunt loop, shunt East and shunt West, and place them on screen like this:
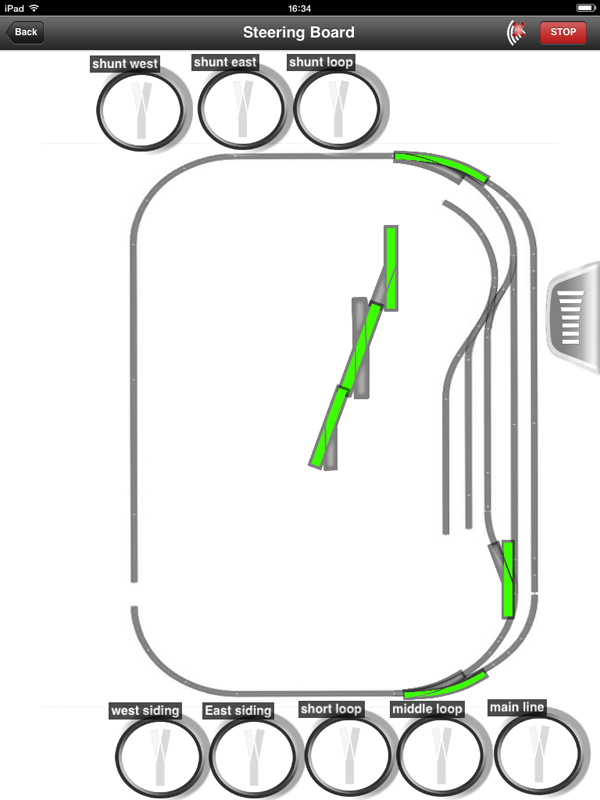
When we tap on a route, the control for that route changes to green as the headshunt and main line can both be used at once, both routes will show green:
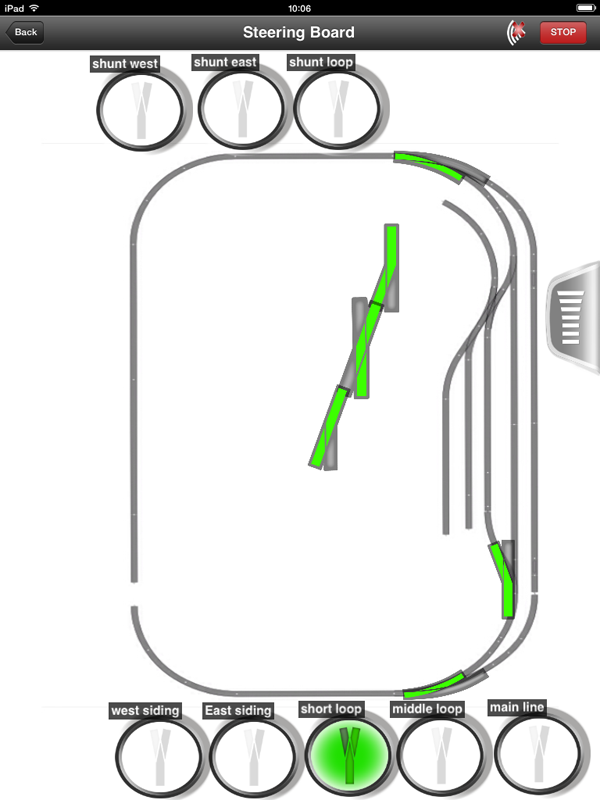
If however, we want to run a train from the main line into the sidings, this obstructs the headshunt and the green light on the headshunt route will go out:
Using Older Decoders
You may have older style accessory decoders that do not have the "learn" function. These can still be used, but they are more difficult to set up. They tend to have 4 outputs, and are normally delivered from the factory pre-set to addresses 1 to four if you have more than 4 points you will need a second decoder, which will need to be set to addresses 5 to 8. As mentioned in the first paragraph, the Z21 will treat these addresses as being 4 digits higher than they actually are, unless you make a small change to the settings of the Z21. This Is also an opportunity to update the firmware of the Z21 base unit. You will need a PC or laptop to do this, and an internet connection. We will cover this in the next part!
