
Z21 Guide: Loco Functions
Contents
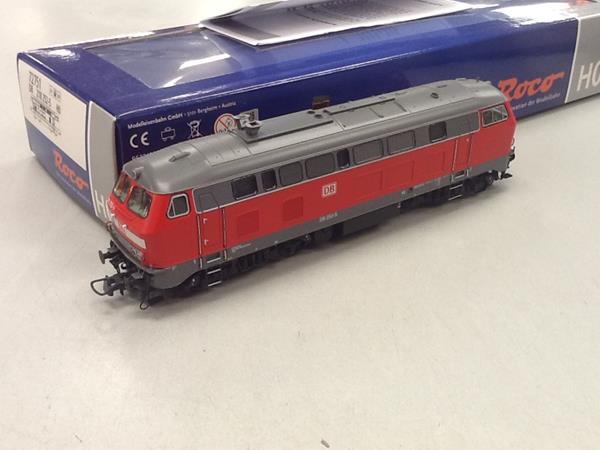
In this second installment of the guide, we will take a look at controlling the more advanced loco functions, and we will also cover double heading (or consisting) locomotives. For this demonstration, we will be using a Roco 72751 sound fitted class 218 loco:
Loco Settings
As with any DCC fitted loco, the instructions should include a listing of the functions, along with which function number is used to trigger each one. We will need this to tell the Z21 which function is which:

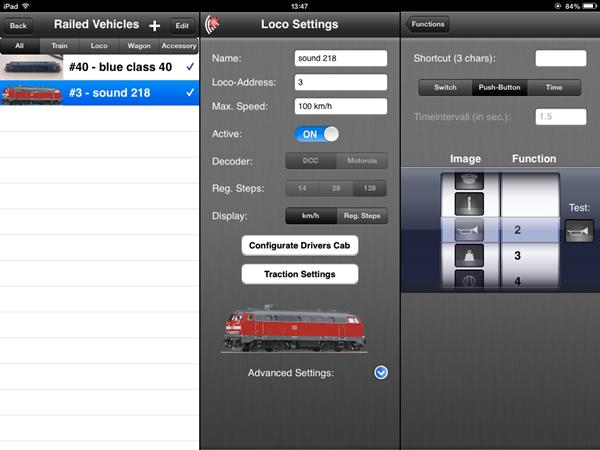
Sound locos typically have a lot of functions, this one has 19 in total you do not need to set up all of these to use the loco, and if you wish you can always leave some of these off if you do not think you will use them. However for this guide we will add them all. The loco will not need to be on the track for this, as all we are doing is adding data to the Z21 app. From our main screen, tap the "railed vehicle settings" tab, and enter the name of the loco, and if the loco address is set to something other than the default 3 change this to match the address of the loco. Tap the loco silhouette to add a photo (all covered in guide part one) and the basic set up of the loco is done now we can add the functions. On the right hand side of our screen, we can see the empty function tabs:
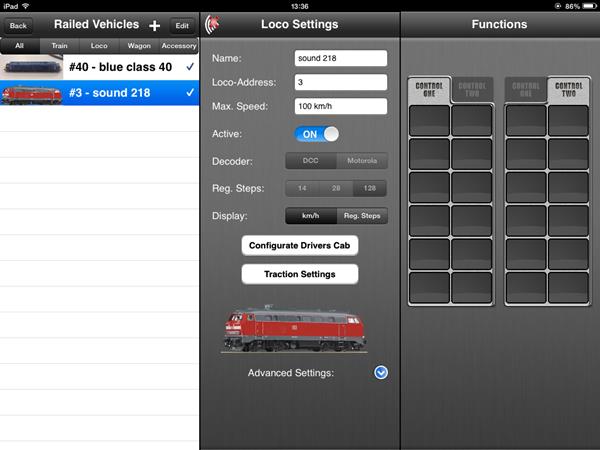
Tap on the first of these to begin adding the functions. We will add these in number order as they are shown on the loco instructions, starting with Zero as this is used to control the most common function, the loco lights. Swipe upwards under "image" to choose a suitable symbol:
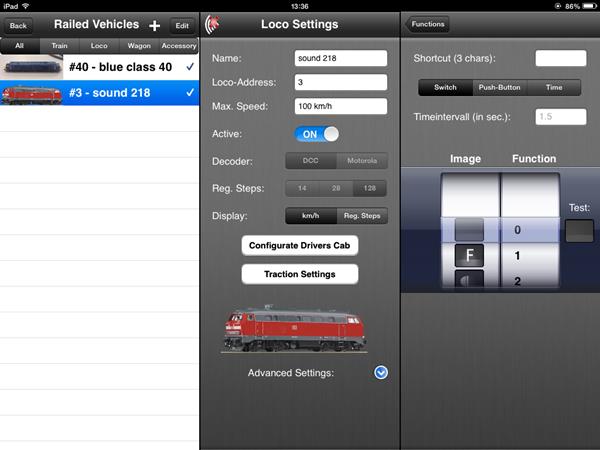
The lights are an on/off function, so that is all we need to do to set this function up. To add the next function, tap the "functions" tab at the top this returns us to the previous screen where we can select the next function the light we have just added is now visible:

Tap the next empty box, and we see the function screen again as we have now assigned function zero to the lights, it no longer appears on the right hand column. Function number one is the sound on/off control, so swipe up the image column until you see the speaker icon:
Again this is an on/off function, so we can leave this set to "switch". Press the function tab at the top again to return to the previous screen, and we see once again the function now appears in its own little tab:

Tap the next empty box, and we will now add our first push button function, the horns. Swipe up on the images again, and find a suitable symbol Ive chosen the trumpet symbol for this. As we do not want the horn to sound constantly when we activate it, tap "push button" at the top, and this will now only sound when we have our finger on the button:
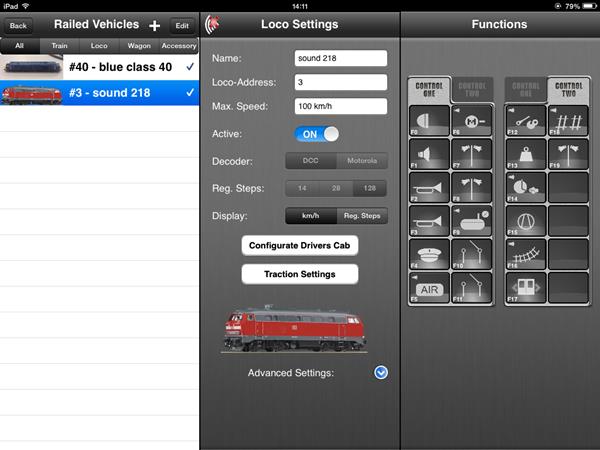
Tap "functions" at the top again to return to the previous screen. You can now continue adding the rest of the loco functions in order there are 24 tabs to fill which is more than enough for the majority of sound locos available. Having worked through the list that came with the loco, we now have all 19 functions showing in the tabs:
Now tap the back button to return to the main Z21 screen, and press the play button. Our new loco appears in the loco list at the bottom tap on the picture to select it, and we can see the functions we have added in the tabs on the left of the screen. The first 12 are listed on the "control one" tab, if you tap the control two tab the higher numbered functions show:
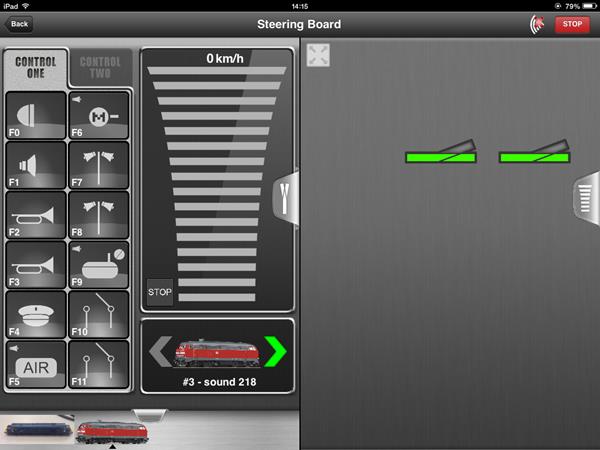
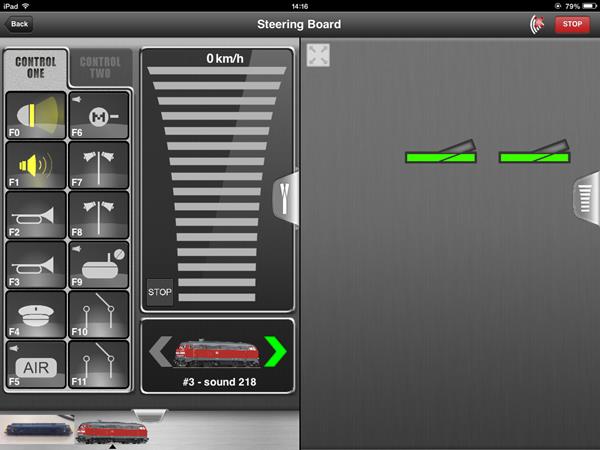
Simply tap the relevant button to activate the function the tab will stay shaded yellow if you have set the function to on/off, or will return to grey as soon as you let go with your finger if you have set it to push button:
Other Loco Settings
Underneath "Name" and "Loco address" on the railed vehicle settings screen, there are several other options to play with. Firstly is "max speed". Note that this does not actually restrict the top speed of the loco! All it does is change the graduation of the loco speed display. This is normally set to 100kmh by default think of this as a percentage of the locos top speed for this reason I normally leave this set to 100.
Below this is the "active" setting this can be used to temporarily remove a loco from the list you see on the main screen, without removing it from your loco library completely. This can be useful for example if you lend a loco to a friend for a while.
Under this is a toggle between DCC and Motorola decoder formats. You will not need to change this if you are not running a Marklin 3 rail system. Below this you can choose the number of speed steps the loco uses again this will not alter the top speed of the loco, it changes the number of graduations. If set to 14 speed steps, you may find the loco surges as you accelerate through the speed steps. This is normally best set to 128 speed steps for the smoothest control.
Underneath this you can change between a km/h display for the loco speed, or the number of speed steps this is down to personal preference.
Configurate Drivers Cab
This will be covered in a future installment, basically what this allows you to do is to control a loco from the perspective of a drivers cab (tablets only). There are three free cabs available for download, and several more that are paid for. Roco will be releasing locos fitted with a camera in the cab front, and this feature will really start to shine then!
Traction Settings
This is one of the more useful settings it will take a while to set up, but this only needs to be done once for each loco, and once done it will allow you to double head or consist locos together. Double heading with conventional systems can be rather difficult to set up, and it can be a challenge to get locos with different drive mechanisms to run at the same speed even if the decoders are identical. The Z21 works rather differently - the basic idea is to time how long it takes a loco to cover a set distance at different speeds, and the Z21 uses this information to adjust the loco speeds to a common value. The more information you give the Z21, the smoother they will run together.
For this example we will assume you are running your locos over 128 speed steps the greater the number of speeds steps, the smoother the loco runs.
Choose a start and stop point for timing the loco on the Gaugemaster demo layout, the platform is around three feet long so this is ideal. The loco will need to be travelling at a stable speed when it crosses the start point for our timing, so make sure it has a good run up.
Return to the main control screen, and select the loco you will be timing. Accelerate the loco to speed step 10, and using a stopwatch or similar, count how long the loco takes to travel from the start point to the stop point write this number down. Return the loco to where you started, and this time accelerate it to speed step 20. Once again write the time down. Repeat this process at speed steps 40, 60, 80, and 100. You can take more timings at more different speed steps if you wish if you imagine these timings as points describing a curve on a graph, then naturally the more points the smoother the curve will be. If you do this for any loco you buy, you can then run pretty much any combination of locos you have.
Once you have your timings, return to the railed vehicles settings screen, tap "traction settings", and enter the values one by one:
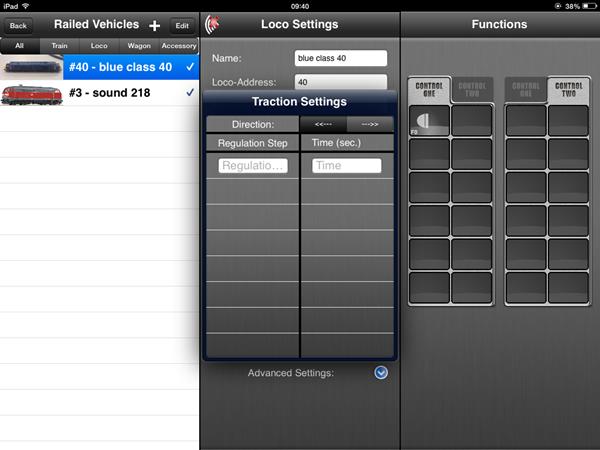
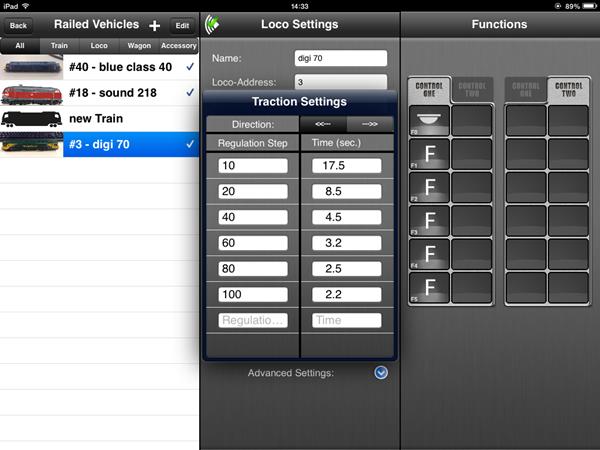
Ive had to find and add a new demo loco for this somebody bought the Class 40 I was using! A Bachmann class 70 has stepped in to the breach you can see the difference in timings between the sound fitted Roco 218 and the Bachmann 70 the Bachmann loco runs a lot faster at lower speed steps:
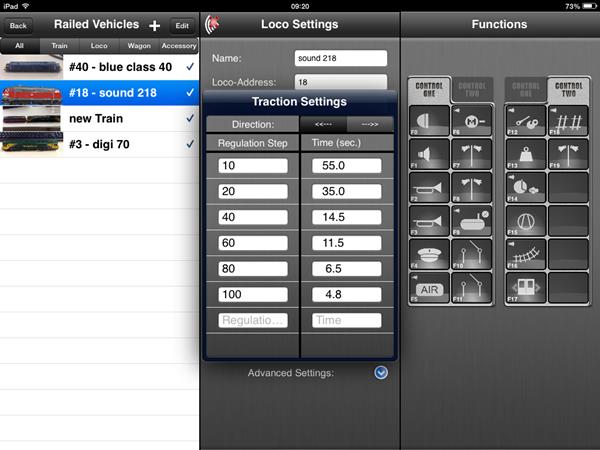
Compare this with the slower accelerating Roco sound loco:
Running Double Headers
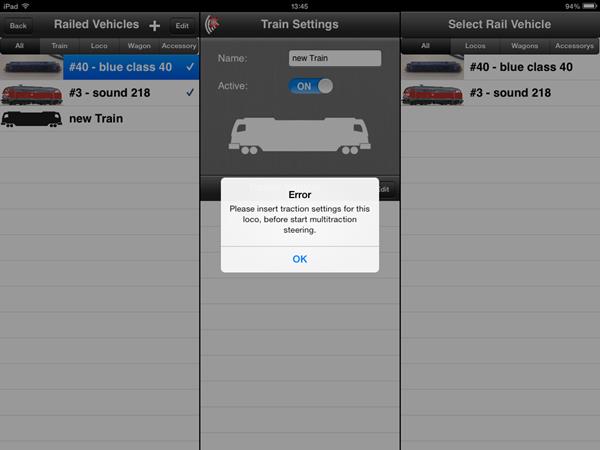
Locos are assembled into consists from the railed vehicle settings screen as well. Tap the "add" symbol at the top, then tap on "train" "New train" will appear, ready for us to add the locos we would like:
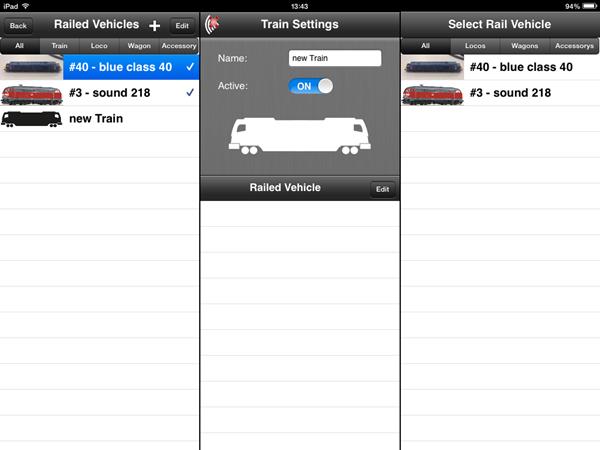
The available locos are listed on the right tap on one to add it to the consist you will not be able to add locos if you have not entered timing information as detailed above:
As I have entered the timings for both the new class 70 and the Roco 218, I can add both of these to our consist and both appear in the centre of the screen. As with locos, you can name this consist if you wish, and to run it you will need to tap the "active" slider under the name. You can also add a photo you can take another picture of the two locos you will be running together to easily identify it. Return to the main screen and press the play button. The new train will now appear in the loco roster at the bottom tap on it to take control:
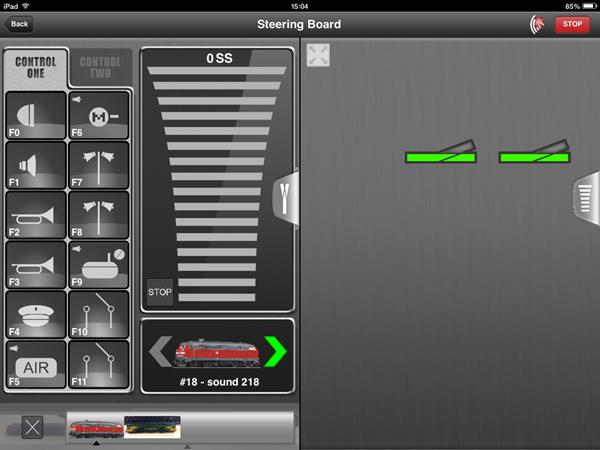
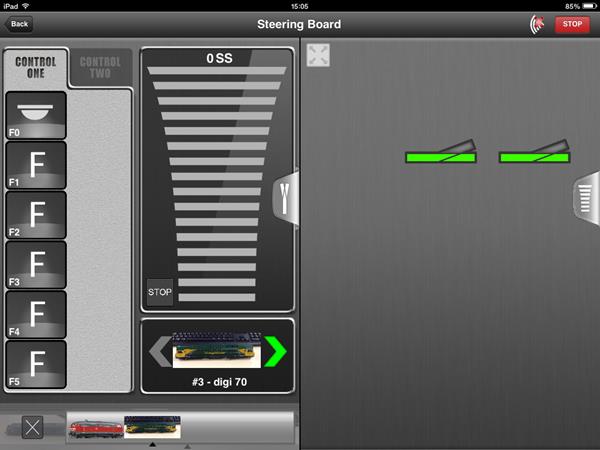
The first loco you added will appear on the left with an arrow underneath, and the controls for the functions for this loco appear above. If you tap on the second loco to the right, you can use the functions for this loco as well:
To return to controlling other locos, simply tap on the X to the left of the locos:
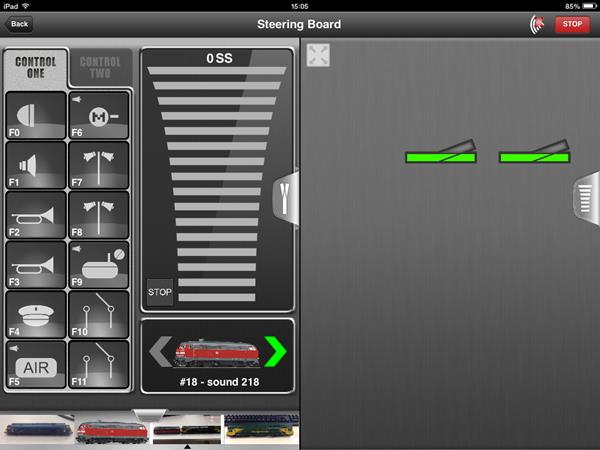
With the Z21, you do not need to break up the consist to run the individual locos again simply tap on one of the individual locos on the roster and you have control over that loco alone again the consist will stay there if you need it, or if your roster is getting too cluttered you can set the consist to "inactive" in the railed vehicles screen. This will not wipe the data from the system when you want to use the consist again simply set it to active again and all of the data will already be there!
In future parts of the guide, we will take a look at programming locos, adding points and a layout diagram, driver’s cab displays, importing and exporting layouts, double heading and more!
